
I've been getting fade issues at the track all along, and also going through brake pads like crazy (2-3 PIR track days per set), so I needed to do something about it. The story goes that part of the reason pads only last so long is not because they're getting "used" up, per se, but because they're just getting so hot that they are melting. I've read about a few people who have done the ducting before with very favorable results (10+ track days on a set of pads after ducting).
I was originally going to buy the kit from Bimmerworld, but then I found the RRT stuff at UUC Motorwerks. After that, I found carbon backing plates at Turner Motorsport. They claimed they had better air flow, and looking at the designs I could believe it... maybe. And I didn't see much of a difference between the $245 and $300 for the carbon ones, so I went with the bling. I ordered the hose and fender couplers from UUC. Honestly, the couplers, at $85, are a huge rip off. All they are is 3" steel pipe with a flange welded to them, then painted. Should cost $5. I almost returned them and made some myself, but alas, I'm lazy.
There are already a few good pages about the install of these kits. Bimmerworld has an install writeup for an E36 M3. This is a pretty good writeup, but many of the things aren't applicable to the M Coupe. Luckily, it's easier on the M Coupe. This page is just a photo album during an install, but it's for an M Coupe, and it has lots of useful pictures.
I think I can refine some of the above for M Coupe specific application, so my version: The first thing you have to do is cut off the stock backing plate (obviously first removing the caliper & rotor). You can do this with metal snips, but I think it's much easier to do it with a Dremel's cut off wheels. Oh yes, the Dremel is crucial for this install. You'll find it very useful! Access to all points of the stock backing plate is kind of tricky, so I wound up breaking several cut off wheels. I wore a motorcycle helmet while using it, and it's a good thing, because several wheels broke and bounced off the helmet. It'd suck to get a cut off wheel embedded into your face at 30,000rpm! Initially I left the three support screws in place because it stops the plates from moving around while you're trying to cut. Eventually you do have to unscrew them. All you have to do is cut one slice all the way through the plate, and then take some pliers to bend the thing into a C shape, and peal it from off the hub. I placed it next to the carbon bits for comparison.
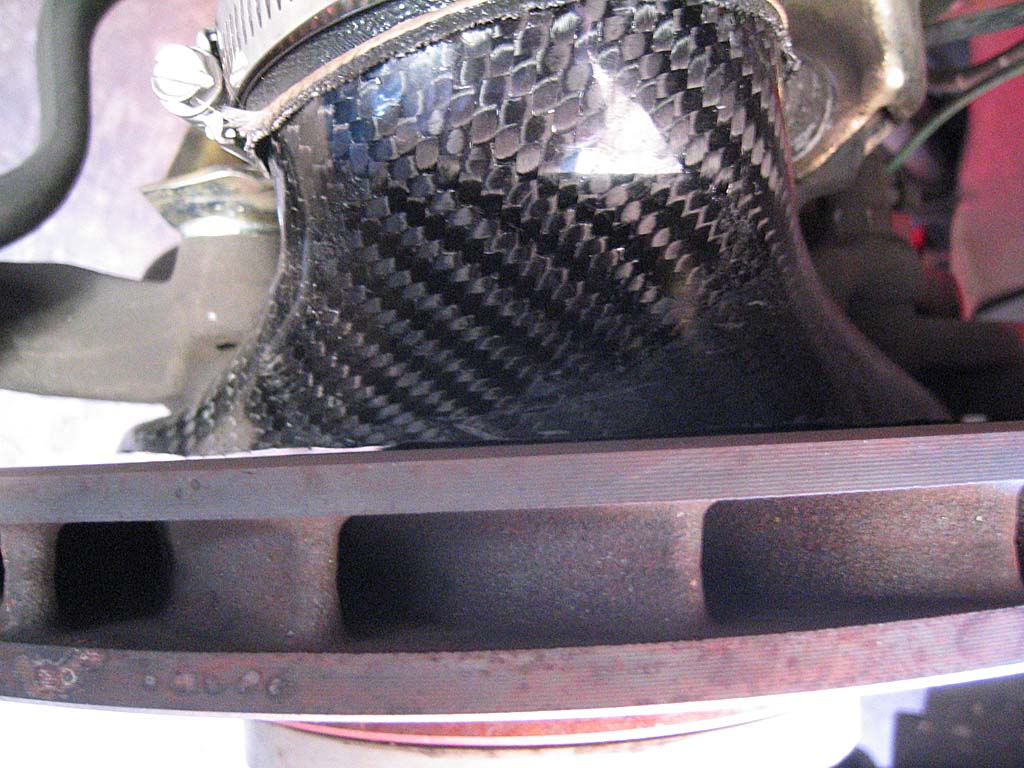
The install instructions from Turner say that for all Z3, you need to modify the backing plate by cutting off a section of it, and they provide a template. They don't tell you how to do this (standard snips could fracture the carbon), though. I didn't see why that would be the case, since the brakes on the M Roadster/Coupe are almost identical to those on the M3... sure enough, no cutting is necessary on M cars. Good deal. The plates slide right on. However, the holes drilled in them didn't align with screw holes, so I had to make them a bit larger with a cutting bit for the Dremel.

The install instructions say "The rotor may slightly rub against the carbon edge because of flex. So some carbon may need to be removed." Well that's lame! The makers of the aluminum and steel backing plates don't make you trim back material! Sounds like their molds are off. Sure enough, when I put the rotor on the hub, it rubbed against the backing plate in several spots! Well, back to using the Dremel again! I put one of the sanding wheels on and ate back some material. Quite a bit, actually... I didn't want to take too much off, obviously, because the proximity of the plate to the rotor is what helps cooling. Here's it finished, with a little gap:
Yeah, my edge isn't straight; big deal, neither was theirs. It's not critical. With the plate on, it was now time for the duct routing. All the install instructions tell you to totally remove the wheel well liner, but I don't think this is necessary! It's a pain in the ass, especially since I have mud flaps that go over it. Basically, I just removed all of the bolts holding it in place, which gave me enough room to pull out the front, and operate on it just fine next to the car. I played a bit with looking at where the hole would be for the hose in relation to other bits, and unfortunately the hole couldn't be too far from the stock duct, because if it got much farther away, the internal hose wouldn't be able to route around a support that holds the plastic tray below and behind the bumper. So I had to drill the hole only about an inch away from the stock duct. Again, it was Dremel time (cutter bit, then sander to finish edges).

Obviously, now the coupler goes in the hole and screws down. Next is time to drill a hole in the side of the air duct. I was a bit worried about the driver's side, since the Dinan Cold Air Intake shares the brake ducting port for its cold air. Turns out the interface isn't really an issue. I'm sure both bits are getting plenty of air.
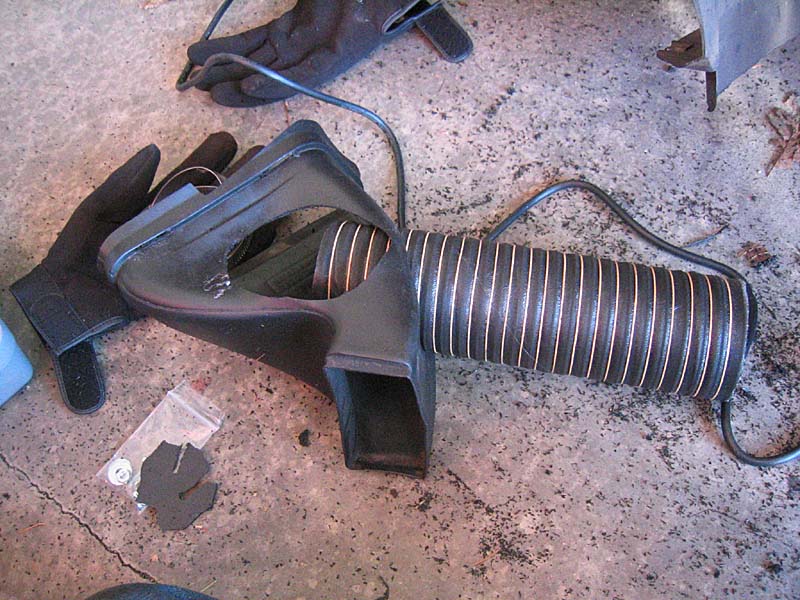

Now was the time to connect the hose to the coupler, and put the wheel well liner back in. I found it actually works best to first connect the hose to the coupler, attach the hose clamp, and then stick the other end through the hole drilled in the side of the duct. There isn't much room to do this, since the hose is only so long, and obviously all these bits are enclosed by the wheel well liner. It is doable, though. Once everything was aligned, I screwed all the bolts for the liner back in. This is how things will be on the street, now, since the hose inside the wheel well won't always be in place.

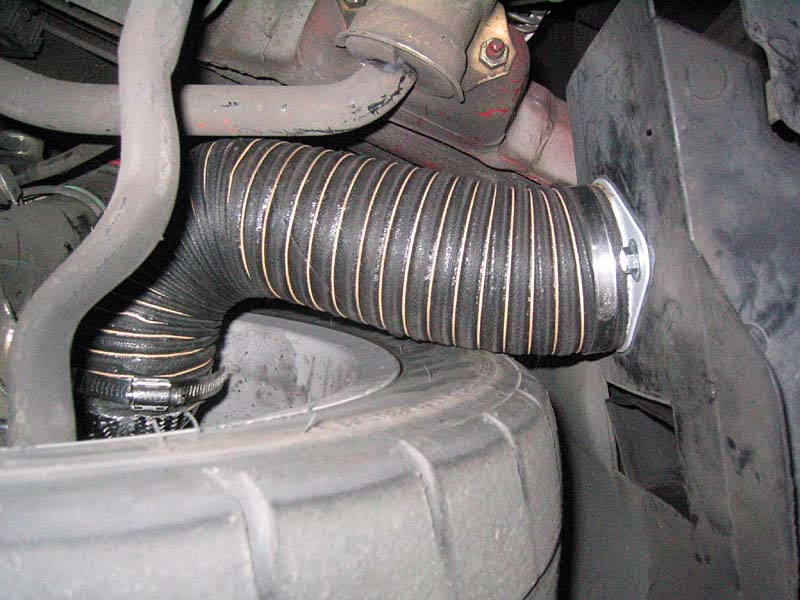
Yes, I know that rotor looks healthy. I wound up using just enough hose so that at full lock the hose had a very slight accordion effect. Of course, with the hose in place, you don't want to turn the wheel to lock because it will crush the hose. However, it's good to have it at this length, in case of a spin or some such thing and the wheels do lock, the hose won't come off, or worse, break the backing plate. This came out to be about 15" of hose. Pictures are at right lock, left lock, and center:


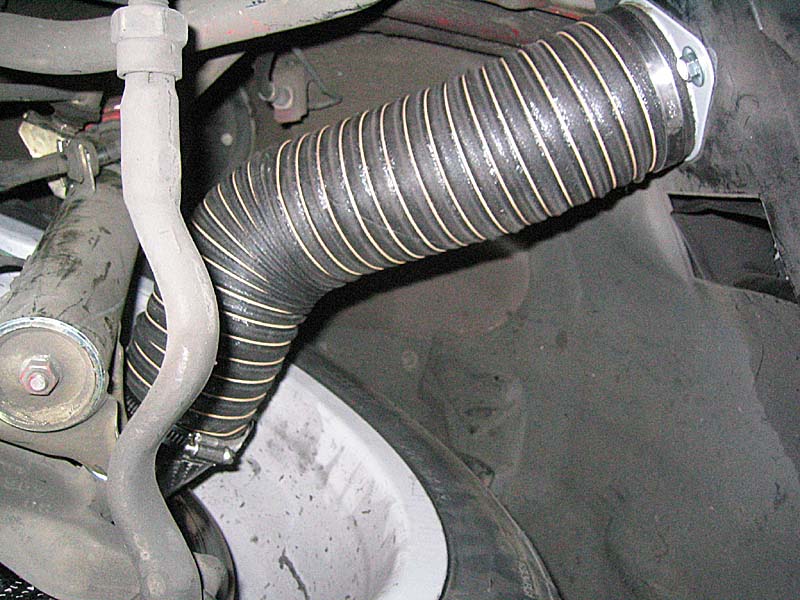
Of course, with wheels on, you can not really turn the wheel to lock, without rubbing the tire against the ducting, which in turn bends the fender lining (since its all attached). Turns out I can turn the wheel exactly one turn in each direction before touching the ducting. This is plenty for most use. The only time one turns more than that is during things like parking or U-Turns. So to and from the track and on track, it should be fine (even the chicane at PIR isn't even more than half a turn). Here are pictures of the wheel turned exactly one turn one direction, than the other. So this is the normal full range of motion:
So that's that! Doug Mill had some wire mesh installed in front of his brake duct inlet at the front of the car so that things like stones don't get piped directly at the rotor. This is a pretty good idea, and I will probably wind up doing this myself. I just didn't have anything appropriate when I did this install. Here's what his looks like:
